Monday, April 26, 2010

The Queen is Alive, Long Live the Queen!

All week I have been reading up on emergency supersedure in the hive, but you can see that all is right in B2 today. After opening the hive, I was too busy looking for the supersedure cell from last week that I missed Queen Bingo on the first pass. My expert photographer noticed that she didn't have her “retinue” of workers around her which is something I usually look for, she was also busy darting about.

The blue making tell the age of the queen. Blue is recognized as the standard for years that end in 5 or 0. Yes, a healthy productive queen can live up to 5 years in the best conditions.

Now that the Queen drama is over, let me walk you through the hive check

Smoking the entrance, smoke calms the bees because it disrupts communication, and sends them into a feeding frenzy. They may take in as much as 3 days worth of food during this time, just in case they need to abandon the hive for a new home if a real emergency is happening.


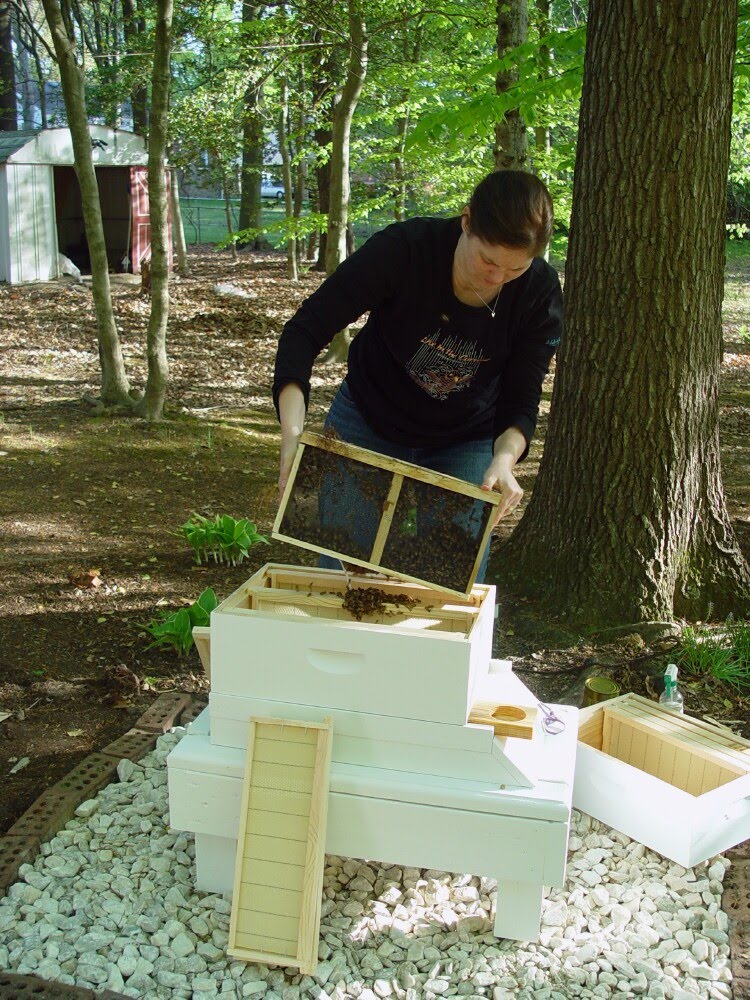
Lifting out the frame for inspection. There was a noticeable difference in the temperament of the bees this week. A sign that the colony is "queen right".

Capped brood and some larva. I really didn't expect to see much this week. I was taken back when I saw this much, because when I opened the hive I was just checking in to make sure the supersedure cell from last week was still ok. I was concentrating on what would have caused this much brood, before I found out the queen was just fine. Based on the number of eggs she produced in the last week I think she is doing just fine.


An example for illustration of queen cell placement and the signal it gives a beekeeper. Both examples are only hypothetical neither situation is currently happening in the hive.

On the top, the large cell would be where a supersedure cell would be in the middle of the frame. This signals to the beekeeper that there is a problem with the queen and the hive is doing something about it.

On the bottom, shows where a swarm cell would be. This signals that the hive is over crowded and that 1/2 or more of the hive is getting ready to leave for a new home. In both cases if a keeper is mostly interested in honey production this would be a sign that the yield will be greatly diminished this year.


I borrowed some frames from “Club Fergie” as I mentioned in another post. The picture on the top shows how dark the comb has become in a years time. Every time a new cycle of bees hatch, the cells get polished with propolis which causes the darkening. The picture on the bottom shows the band of pollen that is usually stored above the new brood on a frame. The larva are fed a mixture of pollen and nectar called "bee bread" from days 3-9 before they are capped for the remaining 12 days.


This big ugly cluster of capped brood are drone cells. A drone is larger than a worker, this is the reason why they have larger cells that are prominent next to worker cells.


At the center of the picture is what a drone in comparison to a worker looks like. A couple of things to remember about drones. They are much noisier in flight and may startle you if you see this large noisy bee flying at you, but remember a drone doesn't have a stinger so the only thing it can do is annoy you.

Because of last week, I believed the hive wasn't “queen right” when I went out today. Not knowing how their temperament would be I brought along my frame grip to assist in keeping my hand just a little further away from the bees.


Here is me playing with the frame grip. Since I was putting another super on the hive I needed to add a frame that the bees were already working to the new super in order to signal to them that it was alright for them to move upstairs.


Here is the next level going on. You can see now why I have begun to date mark the frames. You see that even with a simple hive manipulation one can quickly loose track of which frames were added when.

Finally B2 is back together, a healthy queen right colony that is getting stronger everyday under the watchful eye of the tomten, with a new level added. I will check them one more time next week, then they will be on their own for a few weeks.

Tuesday, April 20, 2010

B2: Bad Bee News

I have been putting off checking B2 the last few days because it has been cooler and breezy. Today was calm so even-though my excellent photographer wasn't here to document it all I still had to do it.

So far so good some activity at the entrance, pollen being gathered.

Under the hive cover not much activity around the inner cover.

Looking better, I see some new drawn comb. Bees working.

Oh No! Where is the rubber band? Did the cage fall? Sinking feeling

Cage is still in place. Queen has been released, but where is she?

Bad news on the bee front, the big waxy cell on the side of the frame is called a “Supersede Cell.” Looks like supersede procedures have begun and Queen Bingo was nowhere to be found. Looks like she is either gone for good or not the Queen the hive needs her to be.

Today I only saw a handful of eggs and less than 10 larva. Hopefully the queen was here as recently as 3 days ago. Will do thorough hive check on the weekend to see the status of the queen, even if I missed her, the fact that the hive started with making the cell tells me she was either rejected by them or in poor health. It is good that they had some eggs in order to go into emergency mode, I just hope the eggs I saw are actually fertile eggs and not the byproduct of a laying worker. An egg produced by a worker is infertile and can only become a drone.

Now putting these photos together I have this sinking feeling that when the bees chewed through the rubber band, when it snapped could it be possible that it killed the queen or injured her? I may never find out, but I do know next time around I am going to play it safe and move to twine or florist wire just in case that is what caused this current situation.

Friday, April 16, 2010

The Tomten Visit

There is a book that my wife really enjoys called “The Tomten” by Astrid Lindgren. She likes to have me read it to her as she falls asleep. In the last few months I have been adding an additional visit by the Tomten to the farm’s beehives.

The Tomten stopped by the beehive to refill the entrance feeder. The Tomten talks to them in tomten language, a silent little language the bees can understand.

“Springs come and springs go,
Nectar come and nectar go,
Soon you won't be needing this feeder.”


Saturday, April 10, 2010

Sharing my Knowledge

Melissa, as I have previously mentioned, made the trip with me down to Brushy Mountain Bee Farm to pick up bees. This year is her first year in beekeeping. Although I had read 3 books on the subject attended meetings with the Richmond Beekeepers, watch a video of an installation, as well as witnessed a live installation demonstration, I still remember my feelings of doubt as I first touched a package of bees. What made it easier for me when I arrived home was that I had the support of my wife to assist me in the new venture. Melissa’s husband fully supports her new venture, he however has a very real fear of bees. Knowing this I decided to be available for her during her installation just in case those feelings of doubt surfaced. I only offered a couple of words, but she didn't need my help at all. Her confidence during installation shows she will be a successful beekeeper. Here are a few pictures of Melissa with her new hive on Day 1.

Misting down the package with sugar water, this not only makes the bees sticky and temporarily makes them unable to fly. Having 10-12,000 bees this isn't perfect odds to get every one, but it allows you to be able to deal with a couple hundred instead of a couple thousand.

Removing the shipping lid, under this is where the travel feeder is as well as the cage containing the queen. Both are removed before the introduction happens.

“The Dump” The moment when the majority of the bees with quickly learn where their new home is. Imagine if almost all of those bees weren't sticky with sugar water. The queen cage had been transferred to the frame in the very middle right below where the mass of bees are being dumped.

Last, here is her new hive ready to go. The package was placed in front of the hive to allow any ones that were left behind the ability to quickly find their way to the hive entrance as soon as the hive sets up some scenter who will use their pheromones to send out a signal to any lost bee in the area the way back yo the hive. As you see, right now the hive only has one level so that it controls the growth of the hive to fill the brood box before adding a second. Having one level also makes it easier for it to defend itself against pests as well as maintain the correct temperature. In this area of Virginia our average last frost date is still a couple of weeks away so being able to cluster on those colder nights is very important to the well being of this new hive.

To read what Melissa had to say about the installation go visit her here.

Brushy Mountain Package Pick-Up

B2-day had arrived. My package of bees for the new hive was ordered back on February 3 and now was time to go an pick them up. Mady had decided that she wasn't up for the trip this year so it was Melissa, a new beekeeper, and myself making the trip. We left my house around 6:15AM and arrived at Brushy Mountain Bee Farm a little after 10AM a distance of about 250 miles.

The entrance and a customary photo op.

Here is a line of beehives that Brushy Mountain Bee Farm keeps. One of the nice things that Brushy Mountain does is that they do a package installation demo. This is a wonderful opportunity to finally see first hand what so many new beekeepers read about as they are starting out. I know last year what a great confidence builder it was for me to experience so I made sure that Melissa had a chance to see it also.

Melissa enjoying the package installation demo.

After taking the time to look around the scratch and dent store, and the main retail store it was time to get our packages. Here is a picture of the stacks of bees awaiting their new hive homes with different beekeepers.

Stack of packages. One thing to remember is that although there is 10-12,000 bees included in these packages, they are only temporary, the most important thing you are getting here is the queen. Unfortunately, with the life span of a worker bee, these bees will be dead in 3-6 weeks replaced by the new bees of the queen will produce once she begins laying when she is released in a few days.

Me with my new package ready for “B2” when I get home.

Friday, April 9, 2010

The making of “Bee Tea”

B2-day is upon us. I get my new package tomorrow. However, before I am off to bed I needed to get ready by making up a batch of “Bee Tea.” This is an alternative to the “Bee Juice” mentioned in most beekeeping material which is just a 1:1 sugar water.

In the early stages of a new hive, one needs to provide the hive with nourishment. I made up some “Bee Tea” tonight which is 1 cup pure cane sugar : 1 cup weak chamomile tea and adding a couple of generous pinches of sea salt (helps digestion) and a couple of pinches of ground thyme (added nutrients). "Bee Tea" is a way to help build the bees immune system naturally.*

*I have Ross Conrad from Dancing Bee Gardens to thank for this tip.

The gallon jug holds 10 cups each of tea and sugar, which is about 15 cups mixed. I use the mortar and pestlel to grind the course sea salt with the thyme together. I reuse the same tea bag for all 10 cups of tea which makes weak tea.

The bees will be fed this for the next 4-6 weeks. The solution helps in the drawing out of comb. When the comb is drawn out it will be used to store food and rear young.

Wednesday, April 7, 2010

Cluster of Bees

For the last two days it has been around 90ºF with a low the mid 60sºF at night. I was up early this morning and I looked out the back window to see this large mass of bees on “Club Fergie.” I didn't think that it was particularly warm, so I went out to investigate.

Sure enough there was some fanning going on. Fanning occurs when the hive temperature is above 95ºF. Most likely these forager went outside to help alleviate some of the heat. However with the outside temperature being much lower, these bees probably began to cluster together for warmth. Clustering occurs when the temperature begins to drop close to 57ºF.

Recently I had changed the entrance reducer to make the entrance larger, it is still in the mid 40sºF at night and cooler so I didn't want to remove it completely. We are still 3 weeks away here from our average last frost date.

Tuesday, April 6, 2010

B2: is ready to go

On Saturday, my second trip to Brushy Mountain Bee Farm in Moravian Falls, NC will commence to pick up this year's package bees. Besides my every loving co-conspirator we are also traveling along with our friend Melissa who will also begin keeping bees this year.

This is the location of the new hive in relation to “Club Fergie”. Bees need less than a foot of space between hives, so there is plenty of room in my bee yard for them to peacefully coexist. One thing about location, You want your bees to have a good mix of sun and shade. Morning Sun is crucial in getting the hive woken up and the foragers out working the day. By mid-day you ideally want the hive sitting in a shady location to help alleviate some of the heat in the hive. A bee hive will maintain a constant temperature of about 90ºF and anything the keeper can do to assist with this is beneficial for all parties.

Here it is “B2” ready to go. On Saturday we are picking up a 3lb package which includes about 10,000 bees and a queen. This will become their new home in a short time.

Just a little about this set up. Beekeeping requires certain equipment, but it doesn't have to cost a fortune to buy everything.

The hive components were purchased at Brushy Mountain last year in their “scratch and dent” shop. Since the hive it sitting outside and subject to everything nature has tho throw at it, it was not important for me that it start out perfect. I saved about 50% doing this. Another angle to take is to build your own components. The internet is full of great DIY plans.

The hive stand was built with scrap wood from “The Big Orange Depot”. Once again less than perfect wood in odd sizes can easily be acquired for $1.00 or less a board. The design for the stand was my creation influenced by simple engineering principals.

The hive pad was built using found materials. The landscaping timbers were found in the trash, the bricks came out of a dumpster, and the rocks were shoveled out of the street gutter. It was put together over a thick layer of newspapers that came out of recycling. The newspapers prevents growth of plant material from poking through the rocks. It took me a few months to acquire everything, but once I knew that I was going to need a new hive location last year the planning began.